Recovering information on a flash drive after a virus. Recovering files after a virus. Using the "dir" command
Read also
Instructions
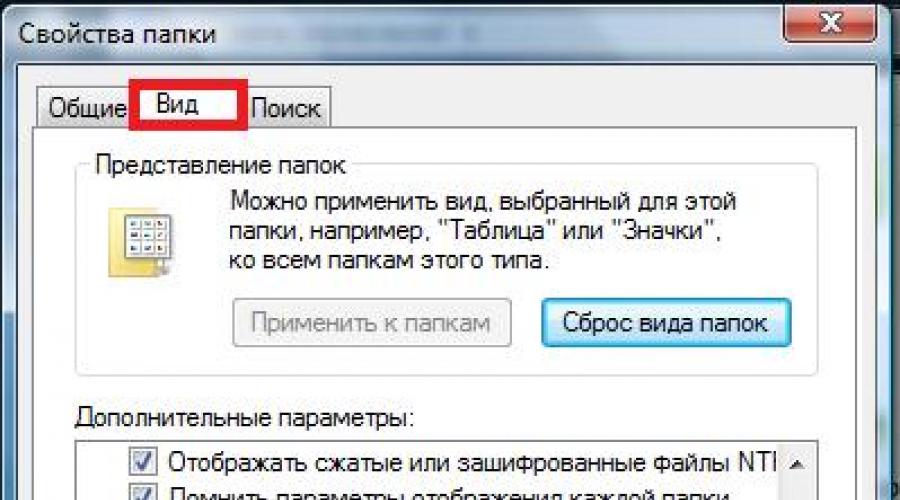
Go to the "Control Panel" of the Windows operating system, which is located in the "Start" menu. Then double click on the "Folder Options" icon. A dialog box will open in which you will need to go to the tab called “View”. This tab contains folder display settings. In the scrolling list, find a line called "Hidden files and folders." Then check the box next to the "Show hidden files and folders" command. After that, click OK to apply the changes made. Now all hidden files and folders will be displayed in Windows Explorer, their appearance will be translucent, unlike regular folders. In order to make them fully open, you will need to change the attributes of these files.
Select the hidden file that you plan to fully open. Right-click on it and select “Properties” in the context menu that opens. In the dialog box that opens, uncheck the box next to the word “Hidden” in the “Attributes” section. Click the "OK" button. From this moment on, this file will be open for editing and viewing without restrictions. If you changed the attributes not of an individual file, but of an entire hidden folder, the system will offer to open the files attached to it as well. Do this if necessary.
In addition to opening hidden files using standard Windows tools, you can also view them using file managers, for example, Total Commander. To do this, just click the "Hidden elements" button in the upper toolbar of the program.
note
There is also another way to open the Folder Options dialog box. In any open folder, select "Tools" -> "Folder Options". The dialog box that opens will be similar to the one that opens from the Control Panel.
If you have ever gone into file properties, you have probably found attributes in the “General” tab, such as: “Read-only”, “ ”, “Archive”. Files marked "Hidden" are not always visible in the folder. This depends on your computer settings.
You will need
- Computer.
Instructions
Open the Control Panel in Explorer and find the “Properties” group, then the “View” tab. Scroll to "Hidden folders and" and check if hidden objects are showing. If not, as in the picture, change , save and exit the menu.

You can attribute “Hidden” in the object itself. To do this, select it by clicking the left mouse button, open the menu with the right mouse button and select “Properties”. Next, in the “General” tab at the bottom, find the list of attributes and uncheck the box next to the “Hidden” attribute. Save and exit.
Video on the topic
In Windows, by default, everything is hidden from the user files, modification or removal of which may lead to incorrect operation of the operating system itself or user applications. This is done in order to prevent troubles resulting from the actions of insufficiently qualified users or simply accidental damage to system files and important data. However, sometimes there is still a need to work with these files.

Instructions
Ways to get to the desired operating room settings. One of them:
Step 1: First, let's launch the control panel. Do this by pressing the “Win” key and, without releasing it, the “R” key, and then in the dialog box that appears, entering the command “control” and pressing “Enter”. Another way to launch the Control Panel is by clicking the “Start” button, the “Settings” section and in it the “Settings” menu item.
Step 2: In the control panel, click on “Folder Options”.
Step 3: in the window that opens, go to “View” and at the very bottom of the list, find and check the item “Show hidden
Another way to the desired setting is Windows Explorer.
Step 1: you can launch Explorer by pressing the “Win” key and, without releasing it, the “E” key (this is a Latin letter, “U”). Another way to launch Explorer is to double-click on the “My” icon.
Step 2: then in the top menu select the “Tools” section and in it the “Folder Options” item. As a result, the same window will open that we described in the previous method, so the next step will be exactly the same.
Step 3: in the window that opens, go to the “View” tab and at the very bottom of the list, find and check the “Show hidden” files and folders" and click the "OK" button.

Video on the topic
Remove hidden folder possible in several ways. A simple hidden folder, if it does not affect processes and software does not depend on it, should be deleted very simply. The situation is more complicated with a folder from an incorrectly deleted application or a folder with a virus.

Instructions
Find folder possible in several ways. The simplest is to view operating system directories using a file manager (for example, Total Commander). Such managers, as a rule, make them available (and they can be deleted).
If such a file manager is not installed, you can make everything simpler. You need to go to the directory where the hidden folder is located and click “service” at the very top, then select “folder properties”, go to the “view” tab and set it to “show hidden files and folders”.
If the folder refuses, you should check what kind of file is located in it and the operating system process. It is quite possible that the file is a system file, but if the folder is not located in the Windows directory (for example, System32), then it is quite possible that any other software is located in the folder. In order to make sure what this process is, you need to check it using the free AVZ utility. If you are convinced that the process is not a system/network process, you can (and perhaps simply need to) delete it.
Similar folder you need to check for viruses using an effective antivirus (for example, Kaspersky Internet Security). Or if a file in a folder takes up less than 20 MB, it is possible to scan it against many antiviruses at once in . If there really is a virus located there, then the security utility should eliminate it, after which folder can be removed correctly.
If the folder is still not deleted, you need to delete it using the special Unlocker utility. After installation, you need to right-click on folder, select “ ” and delete. Also, after this action, it would not hurt to clean up possible files associated with this folder using the CCleaner program.
Sometimes users need to use hidden files or folders in their work. This can be easily done by making the appropriate system settings settings. Also, the hiding elements function is very useful if you need to hide data from prying eyes.

Instructions
Open any folder on your computer. In the menu at the top, open “Tools” and “Folder Options”. You can also find settings for displaying folders and files in a similar menu in the Control Panel. Select the appearance settings tab in the window that appears, scroll the list to the very end. Here you can also configure other attributes of files and folders.
Find the item responsible for displaying hidden elements of the system. Check the box next to “Show hidden files and folders.” Click the "Apply" button. If you want to change this setting in the future, proceed in the same way, but at the end select the original parameter.
If you want to configure the visibility settings of a folder, select it using the right mouse button. Select the very last item “Properties”. On the “General” tab, select the “Hidden” attribute or deselect it according to how you want to configure the display type.
If you want the visibility attributes for folders and their contents to be different, click the corresponding button in the window that appears.
Be careful when performing operations with hidden data. This feature can be configured differently on many computers, so when copying hidden confidential information that is important to you for later data transfer, use special removable media that you do not use for other purposes, since it may be foreign.
When performing the operation of copying data to removable media, make sure that you do not place unnecessary hidden data on it. To do this, turn on the show hidden items function and view the contents - perhaps attached files and folders will contain unnecessary information.
Video on the topic
note
Hidden, undisplayed items are also copied to removable media, just like regular ones.
Helpful advice
Keep sensitive, hidden data in a separate folder.
The operating systems of the Windows 7 line have been significantly updated compared to Windows XP and 2000. The changes affected many interface features. Now, for those who are used to the old way of setting, it is not easy to find the familiar dialog boxes.

Instructions
To configure the display of hidden files and folders, you will need to get to the Folder Options window. This can be done as follows. Click "Start" and select "Control Panel" from the menu.
If you're viewing by category, open Appearance and Personalization and select Folder Options or Folder Options. If all the items in the Control Panel are displayed as icons, then the Folder Options item will already be among them.
Click the View tab in the Folder Options dialog box that opens. In the "Advanced Options" area, you will see a list of settings, opposite each of which you can check or uncheck. Find the “Hidden files and folders” item, usually it is located at the very end of the list.
You will see a switch consisting of two items: “Do not show hidden files, folders and drives” and “Show hidden files, folders and drives”. Set the value opposite the “Show...” item. Click OK.
There is another way to access the Folder Options dialog box. Open an Explorer window. While it is active, press the Alt button on your keyboard. There are two of them, and they are always located in the bottom row, to the right and left of the space. An exception may be the keyboards of some laptops.
An additional panel will appear in Explorer, which contains the tabs “File”, “Edit”, “View”, “Tools”, “Help”. Select "Service". The bottom item in this menu is “Folder Options”. Click on it. Complete everything described in the third and fourth steps of these instructions.
There is another way to open a dialog box with folder view settings from Explorer. In the regular window panel, there will be an Arrange menu at the top left. Select it. There, approximately in the middle of the list, there is the item “Folder and Search Options”. Click on it and the familiar Folder Options window will open.
Helpful advice
It is not recommended to enable the display of hidden files and folders if there is a risk that someone who has access to the computer could change or delete them. Most often, system files, as well as those that contain important settings, are marked as hidden.
How a file is displayed and what actions the user can perform with it is partly affected by the attribute assigned to the file. If a folder or file is assigned the Hidden attribute, it will become invisible. A little more about how invisible files make visible and vice versa.

Instructions
First, configure the display of hidden files and folders. To do this, refer to the Folder Options component. You can call it in several ways. Using the Windows key or the "Start" button, enter the "Control Panel". In the Appearance and Themes category, select the Folder Options icon.
Alternative method: Open any folder on your computer. In the top menu bar, select “Folder Options” from the “Tools” context menu. A new dialog box will open. Go to the “View” tab.
In the "Advanced Settings" group, scroll down the list until you find the "Hidden" files and folders." Set the marker in the “Show hidden files and folders" and apply the new settings. Close the properties window with the OK button or the [x] icon.
All files, which were previously invisible, will become translucent. This is the display method adopted for hidden files and folders in the mode you just configured. To convert them to regular ones, refer to the properties of the specific file or folder.
To do this, move the cursor to the icon of the desired file and right-click on it. In the context menu, select the last item – “Properties”. A new dialog box will open. With the General tab active, look for the file attributes section at the bottom of the window.
Uncheck the Hidden field and apply the new settings. The file you selected will no longer be translucent. Now, even if you check the “Do not show hidden” option in the “Folder Options” window files and folders", the file you select will still remain visible.
One thing to keep in mind: when you edit any file in the program, a temporary copy of it is created. It appears as a hidden file. Even if you make such a temporary file normal, after saving the original and closing the application in which you were working, it will disappear.
Sources:
- how to make files hidden and invisible
Configuring the Windows version 7 shell to display hidden system files and folders can be done by the user using standard system tools and does not require the use of any additional programs.

Instructions
Call the main system menu of Windows OS version 7 by clicking the "Start" button to configure the function of displaying hidden system files and folders and go to the "Control Panel". Expand the Appearance and Personalization link and expand Folder Options. Select the “View” tab in the dialog box that opens and find the “Advanced Options” section. Check the box next to “Show hidden folders and drives” and confirm saving the changes made by clicking OK.
Another way to enable the function of displaying hidden system files and folders differs only in the method of calling the desired menu. Expand the “My Computer” desktop item and expand the “Arrange” menu in the top service bar of the application window. Select the “Folder Options” item in the drop-down menu of the selected line and select the “View” tab in the dialog box that opens. Go to the “Advanced options” section and check the box in the “Show hidden files, folders and drives” line. Save your change by clicking OK.
Another method for enabling the desired function is to use hot function keys. Expand the My Computer desktop item menu and press the Alt function key. Select the “Service” item in the menu that opens and select the “Folder Options” sub-item. Go to the "View" tab in the dialog box that opens and check the box in the "Show hidden files, folders and drives" line. Confirm the selected action by clicking OK.
Please note that changing hidden system files and folders may cause the entire operating system to malfunction and require a complete reinstallation. Make sure you have a good understanding of what is changing and how it is changing before editing the selected files.

Show hidden folders
Open the Start main menu and select Control Panel. In the window that opens, go to the Appearance and Personalization tab and click on the Folder Options link. In the Folder Options window, open the View tab, in the Advanced settings list, find the Hidden files and folders item and set the switch to Show hidden files, folders and drives, this will give you access to hidden files, folders and drives. In the same list, uncheck the Hidden protected operating system files (Recommended) box, this will allow you to see all hidden system files. When you are finished making changes, click OK. Be careful when working with previously hidden system files. Accidentally damaging or deleting them can negatively affect the operation of the operating system.Changing folder properties
By making changes to your system settings, you will be able to see previously hidden folders, but they will still be marked as hidden. To finally make them visible, you need to cancel this property of them. If you know where the previously hidden folder should be located, use the Explorer window to navigate to it. Open File Explorer and navigate through the folders until you find the one you're looking for.If you do not know the location of the folder, open the Start main menu and use the file and folder search form in it. Enter the full or partial name of the folder in this form. As a result, you will see a dynamic list of matches found.
Once you have found the folder you are looking for, open its properties. To do this, open its context menu by right-clicking on the folder and select Properties, located at the very end of the list. In the window that opens, go to the General tab. In the Attributes section, uncheck Hidden and click OK.
Resetting to original settings
Once you've finished restoring hidden folders, you can return the operating system to its previous mode of displaying files, drives, and folders. To do this, go to the system control panel again and open the Folder Options window. In the Advanced settings list, again find the Hidden files and folders item and now select the Don`t show hidden files, folders or drives radio button. Then check the Hidden protected operating system files checkbox. If you want to hide sensitive data from prying eyes, store it on removable media, such as USB drives. This will help avoid future loss of data hidden on the computer.Read about where and how to look for files that have been deleted by a virus or blocked by an antivirus program. Did checking your computer for viruses put you in a difficult situation? An antivirus program has deleted infected files from your computer or laptop and you need to return important documents?
2014-02-20 Michael Miroshnichenko
- Read how data is recovered from an NTFS disk. What algorithm is used by programs to recover files. Here we come close to the topic of file recovery. Unlike FAT, NTFS is very convenient for data recovery...
- Read how data is recovered from a FAT drive. What algorithm is used by programs to recover files. So, the file system was detected, and we began to analyze it. Now we need to identify the physical sectors...
- Read about the mandatory conditions under which recovery of lost data will be possible. Restoring data without it present may not be effective. Loss of information can result from many different reasons. As a rule, modern...
- Read about how files are stored on disk and exactly how Windows handles file deletion. Many different data recovery programs offer to recover deleted files in just a few clicks. How...
Recovering hidden files after a virus is a common problem that PC users have to face. Recently, many people have been suffering from malware, due to which all files and folders on the hard drive are lost, including personal content like documents, images, etc. Malware can also hide all shortcuts in the Start menu. The virus does not delete data, but adds a hidden attribute to all files and folders on your system, and as a result, it appears as if all data has been deleted from the hard drive.
If you need to perform file recovery after a virus, you can use the instructions below to redisplay all the data that was missing and regain control of your computer. In case the operating system is still infected with malware, you need to use antivirus software. Once the viruses are removed, you can begin to take steps to display the files and folders that have disappeared. To display missing files, you need to change your Windows system settings.
How to show hidden files
If you are running Windows XP, you can recover lost data by doing the following:
- open My Computer;
- select Tools;
- click on Folder Options;
- select the View tab;
- check the box next to the Show Hidden Files and Folders option;
- Click OK to return missing data from your hard drive or flash drives.
To recover data that was lost on Windows Vista, you need to follow these steps:
- press the Start button;
- select Computer;
- click on Tools;
- select Folder Options;
- use the View button;
- select the Show Hidden Files and Folders option;
- click OK.
If you are interested in how to recover hidden files on Windows 7, you need to follow these steps:
- press the Start button;
- select Computer;
- click Organize;
- use the Folder and Search Options button;
- select View;
- activate the Show Hidden Files and Folders option;
- click OK.
After completing the above steps, you will be able to see all your files and folders for office programs and other applications, but they will still contain a hidden set of attributes. If you delete unnecessary parameters for files on a flash drive or hard drive, then all of them will be displayed in normal mode.
How to remove hidden attributes
If you are using the Windows XP operating system, you need to perform the following steps:
- Click Start and Run.
- Type cmd and press Enter.
- In the command line, type CD\ and confirm with the Enter key.
- Type ATTRIB -H *.* /S /D and press Enter. This command will display files that have become invisible. Since important system files have the corresponding attribute attached, the above command will not affect them. System settings let them through and hide them from prying eyes, so your most important content isn't lost. The command will take some time to complete, so don't worry if the process takes a few minutes or even half an hour. The command will perform simple actions - it will remove hidden attributes from all directories on the hard drive and folders on the flash drive after the virus. The /S parameter means that the current folder and all its subdirectories will be searched. The /D option processes all other folders.
For Windows Vista or 7 you need to do the following:
- Click Start and All Programs.
- Select Accessories and Find Command Prompt.
- Right-click on the Command Prompt option and select Run as Administrator.
- At the command line, type CD\ and press Enter.
- The command line should now indicate the root folder of the hard drive (probably C:\).
- Type ATTRIB -H *.* /S /D and press Enter.
- Type Exit and press Enter when the procedure is complete. To restart a computer.
An alternative is to use the Unhide app created by Bleeping Computer. This is a program for recovering hidden files from flash drives and hard drives. On the official website of this developer there is a whole tutorial on using unhide.exe to delete deleted data after a virus invasion. With its help, users received the necessary information and successfully restored their PCs. You can download this application for hidden folders and files on your desktop and run it so that the above steps to remove attributes from a flash drive after a virus will be performed automatically by the system.
Fix problems with shortcuts on the taskbar and Start menu
To display shortcuts on the taskbar and in the Start menu after a virus attack, you need to do the following:
- Open Computer.
- Go to Drive C, Users, Your User Name, AppData, Local, Temp, SNTMP or SMTMP.
- Open the directory with the number 1.
- Select Edit, Select All and Copy.
- Leave the directory open and go to My Computer again.
- Select Drive C, Program Data, Microsoft, Windows, Start Menu.
- Click Edit and Paste to copy the Programs folder and other shortcuts to the appropriate location.
- Open the directory with the number 3.
- Select all files and copy them.
- Go to Drive C, Users, Username, AppData, Roaming, Microsoft, Internet Explorer, Quick Launch, User Pinned, Taskbar and paste files.
After completing the above steps, all shortcuts should return to their places.
Following the forum topic, folders disappeared from the flash drive. This note contains recommendations found in it. Situation description: Folders on a storage medium no longer appear as if they had been deleted. However, the amount of space they occupy remains unchanged, i.e. the space is still occupied by the disappeared folders and the files in them. Most likely this indicates that the information was not deleted, but that the folders simply became invisible. This happens as a result of the actions of some viruses. Below I list ways to make folders visible again:
Enable showing hidden files and folders in Explorer
The simplest case is when the “hidden” and “system” attributes are set for folders, and Windows is configured in such a way as not to show hidden files and folders. It is enough to enable the display of such data and remove the attributes as described in the article: displaying hidden files and folders.
Remove attributes using the command line
Another way to make data visible is using the command line.
1) Open the command line: Start -> Run -> enter: cmd -> click “OK”;
2) In the black command line window, enter:
(where X is the drive letter or flash drive)
3) Select and copy the line below:
Attrib - s - h - r - a /s /d *.*
4) Right-click on the black command line window and press Enter.
Wait until the utility replaces the attributes of all files. After this, the files and folders will become visible.
File manager Total Commander
First you need to enable the display of hidden ones. To do this, go to the “Configuration” menu, then “Panel Contents”, check the box for “Show hidden system files”.

Open the flash drive, select the directories with an exclamation mark and remove the attributes: go to the “File” menu, then “Change attributes”. Remove the attributes and click “OK”.

File Manager Far Manager
You can also use the Far Manager file manager, which by default shows any hidden and system folders, and also allows you to remove unnecessary attributes. Download it, install and run. Further:
1) Open the flash drive in Far Manager: press the combination “Alt-F1 ; (left panel) or “Alt-F2 ; (right panel), then select the letter of the required media from the list.
2) Using the “Insert” key, select the hidden folders, press “Ctrl-A”, remove all unnecessary checkmarks from the “Read only” and “System” items, leave only “Archive”, and confirm with the “Set” button.

Here you can clean the RECYCLER folder, delete shortcuts (.lnk), unnecessary executable files (.exe), and, of course, the autorun file. inf, if present.
After these steps, the data on the flash drive will be displayed in normal form.
Some viruses go further - they rename or move folders to the E2E2-1 directory, which is not visible in Windows Explorer. This is only relevant if the media file system is FAT32; this problem does not exist in NTFS. To find out what file system is on the flash drive, open “My Computer,” right-click on the flash drive, and select “Properties” from the drop-down menu. In the window that opens, look at the “File system” line.

For example, if your flash drive is connected as drive “E”, then go to:
Start -> Run -> cmd -> OK

In the black window that opens, you must enter the commands one by one, confirming each with the Enter key:

The first command makes drive E active. If the letter of the carrier is different, instead of E before the colon, indicate your letter.
The second command displays a list of folders and files on the media. If E2E2~1 is listed, run the command which will rename the folder:
3) ren E2E2~1 NewFolder
After this, the NewFolder folder will appear in Explorer. Instead of NewFolder, you can specify any other folder name if you wish.
In conclusion
That seems to be all about the restoration of missing information after the virus. Just do not forget that before the listed actions it is necessary that the virus itself be neutralized by an antivirus, otherwise the problem will recur.
The antivirus on the netbook is outdated. Due to my own carelessness and eternal lack of time, I updated it only yesterday, when I picked up a modified Win32/Injector.FTN Trojan from someone else’s flash drive, and maybe not only that one...
First, on the removable hard drive (which is 320 gigabytes of information, most of which are valuable photos from your favorite DSLR), the folders became shortcuts, after which they disappeared completely. I deleted the virus, but the folders did not return. After analyzing the fact that the space on the hard drive remained the same, it was decided not to panic and look for the missing information.
A few simple manipulations and everything fell into place. So, if you are facing the same problem, you have the following options:
1) Using the "dir" command
If your flash drive is connected like drive "E", then the process looks like this:
The first command makes drive E active. If the letter of the carrier is different, instead of E before the colon, indicate your letter.
The second command displays a list of folders and files on the media. If E2E2~1 is listed, run the command which will rename the folder:
3) ren E2E2~1 NewFolder
After this, the NewFolder folder should appear in Explorer. Instead of NewFolder, you can specify a different folder name, if desired.
2) Using special software
In my case, I used the Far Manager program 1) Open the flash drive in Far Manager (here everything secret becomes clear all folders are displayed in full).
2) Using the "Insert" key, select the hidden folders, press "Ctrl-A", remove all unnecessary checkmarks from the "Read only" and "System" items, leave only "Archive", and confirm with the "Set" button.
Here we can clean the RECYCLER folder, remove unnecessary shortcuts, as well as the autorun.inf file, if present.
After these steps, the data on the flash drive will be displayed in normal form, provided that the system itself is not infected with anything.
That's all, actually.