Does dep help in Windows 10. Several options for disabling DEP in Windows. Video: completely turn off DEP
Read also
Hello everyone, today I’ll tell you how to disable DEP in Windows.
In this instruction we will talk about how to disable DEP (Data Execution Prevention) in Windows 7, 8 and 8.1. The same should work in Windows 10. Disabling DEP is possible both for the system as a whole and for individual programs that display Data Execution Prevention errors when launched.
The meaning of DEP technology is that Windows, relying on hardware support NX (No Execute, for AMD processors) or XD (Execute Disabled, for Intel processors), prevents the execution of executable code from those memory areas that are marked as not executable. To put it simply: it blocks one of the malware attack vectors.
However, for some software, the enabled Data Execution Prevention function may cause errors to appear at startup - this occurs for both application programs and games. Errors of the form “The instruction at the address accessed the memory at the address. Memory cannot be read or written" can also be caused by DEP.
Disabling DEP for Windows 7 and Windows 8.1 (system-wide)
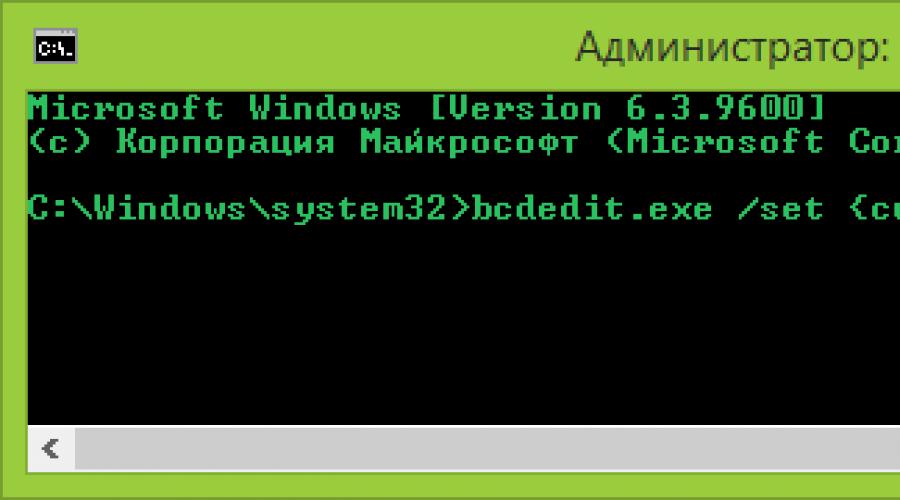
The first method allows you to disable DEP for all Windows programs and services. To do this, open the command line as Administrator - in Windows 8 and 8.1 this can be done using the menu that opens by right-clicking on the Start button; in Windows 7 you can find the command line in standard programs, right-click on it and select "Run as Administrator."
At the command prompt, enter
bcdedit.exe /set (current) nx AlwaysOff
and press Enter. After this, restart your computer: the next time you log into this system, DEP will be disabled.

By the way, if you wish, using bcdedit you can create a separate entry in the boot and system selection menu with DEP disabled and use it when required.
Note: in order to enable DEP in the future, use the same command with the attribute AlwaysOn instead of AlwaysOff.
Two ways to disable DEP for individual programs
It may be more reasonable to disable Data Execution Prevention for individual programs that cause DEP errors. This can be done in two ways - by changing additional system settings in the Control Panel or using the Registry Editor.
In the first case, go to Control Panel - System (you can also click on the My computer right click and select Properties). Select an item from the list on the right Advanced System Settings, then on the tab Additionally click the button Options In chapter Performance.

Open the “Data Execution Prevention” tab, check “Enable DEP for all programs and services except those selected below” and use the “Add” button to specify the paths to the executable files of the programs for which you want to disable DEP. After this, it is advisable to also restart the computer.

Disabling DEP for programs in Registry Editor
Essentially the same thing that was just described using control panel elements can be done using the registry editor. To launch it, press the Windows + R keys on your keyboard and enter regedit then press Enter or Ok.
This is how you can easily disable DEP in Windows.
Starting with WIndows XP, Microsoft operating systems support hardware protection of the ExecuteDisabled (Intel) and NoExecute (AMD) standards. Microsoft collectively called support for these hardware instructions DEP (in Russian - “Data Execution Prevention”). The purpose of the function is to prevent program code read from some areas of RAM from becoming executable. In plain language, this is how one of the ways of infecting a computer with viruses is blocked. The function is certainly useful, but some programmers, when writing their “masterpieces,” do not take into account the specific behavior of the program when such protection is enabled. As a result, a simple user receives the error “Memory cannot be read/write.” If you encounter a similar problem and are absolutely sure that the program is not malicious, you can try disabling DEP protection. This will weaken the security somewhat, but will probably allow you to use the program. I will describe how to disable hardware data execution prevention later in this post.
If you have one or more programs that conflict with DEP, it is recommended to disable protection only for them, without affecting the behavior of the system as a whole. To do this, do the following:

Please note that selectively disabling DEP is only possible for 32-bit programs. When you try to whitelist a 64-bit application, you will receive an error message.  If you absolutely need to run a 64-bit program bypassing DEP, the only way out is to disable protection completely for all applications on the system. How to do this will be discussed a little later.
Disabling DEP through the registry
The second way to disable DEP protection for an individual program is to edit the registry. The steps required for this are:

If you have many programs that are incompatible with the code execution prevention system, or if among them there is at least one 64-bit one, you will have to disable DEP completely. The instructions are as follows.
Hello, friends.
Is your operating system refusing to launch the game or program you want? Find out how to disable DEP in Windows 10 and you will most likely fix your problem.
Is this the first time you have come across this overseas abbreviation? Then it’s all the more worth paying attention to this article, which explains very simply what it is, when to disable the function, and how to enable DEP in case you change your mind.
Decoding
Let's start by explaining the term. Three capital letters hide the phrase Data Execution Prevention. In our language this sounds like “data execution prevention”.
In practice, this concept means the default installed Windows function, something like an antivirus, but in fact it is not considered one. It blocks programs that want to use part of the RAM for their work, which is marked by the operating system as “unused”.
You, in turn, receive a message like this: “the instruction at address “such and such” accessed memory at address “other”, the memory cannot be “written” or “read”.” And all you can do in this situation is click “OK”.
However, that was the case before you came across this article. After reading it, such errors will not be a hindrance for you. I provide you with several ways to disable this service.
Via command line
You only need to follow 3 simple steps:


If you want to return everything to the way it was, do the same, just replace the ending of the command with “On”.
Disabling DEP for certain programs
I don’t recommend getting rid of the built-in blocker at all, because it can still stop some malware. Therefore, I suggest that you disable DEP specifically for those programs that you cannot run, and not for the entire system as a whole.
But you must be sure that they do not contain viruses. Can they be trusted? Then let's get started:
- Open the System section from the Control Panel. An alternative option: right-click on the “my computer” icon and enter “Properties”.
- Go to “Advanced system settings” and in the window that appears, expand the “Advanced” tab.
- Click on the “Options” button located at the top.


Via Registry Editor
You can add exceptions in another way:
- Enter the Registry Editor by holding down the Win and R buttons.
- Click OK or Enter.

- On the left, navigate to the folders HKEY_LOCAL_MACHINE - SOFTWARE - Microsoft - Windows NT - CurrentVersion - AppCompatFlags - Layers.
- If you haven't seen the last one, create it yourself.
- For the program that you want to free from DEP, make a string parameter with a name that matches the path to the file itself.
- The value of this parameter should look like this: DisableNXShowUI.

All the methods described above work not only in Windows 10, but also in 7, 8 and 8.1.
Did this article help you?
Don't forget to tell your friends about it.
In Microsoft Windows operating systems, starting with version XP, there is one interesting feature - data execution prevention, in the original called Data Execution Prevention (DEP). Sometimes it interferes with normal operation and needs to be turned off. In principle, there is nothing complicated about this, and if no effect follows, then you can turn everything back on.
How to completely disable DEP
So, let's get straight to the point. Click the “Start” button and write “cmd” in the search bar. In the search results at the very top we find cmd- this is needed for . To run it with Administrator rights, right-click on the command and select “Run as administrator” from the context menu.
Accordingly, if you are currently logged into Windows as a regular user, the system will ask you to enter the administrator password. Now, insert the command into the black window that appears and press “Enter”:
bcdedit.exe /set (current) nx AlwaysOff
The result should be the message: “Operation completed successfully”

Next you need to reboot for the changes to take effect. Thus, we have disabled DEP for ALL services and programs, regardless of whether your processor supports data execution prevention at the hardware level or not.
How to disable DEP for a specific program
To do this we go to “Control Panel -> System” or right-click on the “My Computer” icon on the desktop and select “Properties”. On the left side of the window, click on “Advanced system settings”

In the “Performance” section, click on the “Options” button

We need the Data Execution Prevention tab. Here, in principle, everything is clear:

By default, DEP only works for essential programs and services. By moving the switch to the “Enable DEP for all programs and services except those selected below” position, we can determine for ourselves which programs need to disable the DEP function. To do this, simply select a program from the list or click “Add” and manually select the launch (.exe) file.
Please note that 64-bit applications cannot be added to this list. Also, the program itself must support working with DEP turned off. In any case, you will immediately see an error message.
Here’s another thing, before canceling DEP from the command line, first check if it worked for all programs. Then switch first to only basic services and programs and reboot. Perhaps the problem that brought you to this article will be resolved.
How to turn DEP back on
To return DEP back, run the command line “cmd” again as an administrator, only this time insert the following command:
bcdedit.exe /set (current) nx OptIn
and reboot.
What is DEP anyway?
Now a short digression: what kind of function is this and what it is used with. Data Execution Prevention is designed to protect the system from certain viruses and system security threats. But, under no circumstances should this be confused with an antivirus or firewall! These are completely different things.
DEP marks some service areas in the computer's RAM as “non-executable”, and if a program tries to execute its code in this area, the function will work, the program will be forcibly closed and a corresponding message will be displayed. The fact is that some viruses can work this way, and therefore this blocking method helps prevent the execution of certain malicious code.
There is both a hardware implementation of DEP (using processor commands) and a software implementation (using special Windows software code). The hardware implementation is more reliable and all modern processors support it. So, if there are no problems, then it is better not to change anything in the settings. But, unfortunately, the DEP function can interfere with the operation of normal programs, so sometimes it is disabled. How to do this - this article will help you!
DEP - from English. “Data Execution Prevention” - preventing data execution is a special function that allows you to protect your computer from viruses. The purpose of its operation is to block programs that, when working, want to use a memory area marked by the system as “unused”. Usually the error is:
Occurs for this reason – the program is not compatible with this protective functionality and is not necessarily malicious. For old games and applications, let's look at how to disable DEP in Windows 7, 8, 10, and this protection first appeared in the Windows XP operating system.
How to disable dep in Windows 7, 8, 10 - several options
I note that the “Data Execution Prevention” function does not affect the performance of the computer in any way and you should not disable it unless necessary. The setup principle for your systems is the same; slight differences in the windows are possible.
Disable DEP using special commands
To do this, run the command prompt (cmd) as an administrator. Find out how to do this
Type the following commands:
- to disable:
bcdedit.exe /set (current) nx AlwaysOff  - to turn on:
bcdedit.exe /set (current) nx AlwaysOn
This will disable "Data Execution Prevention" for the entire operating system, which reduces antivirus protection. Therefore, let's move on to the second method.
Configure exceptions for DEP in Windows
To do this, right-click – “My Computer” – “Properties” – “Advanced” tab – “Performance” section – “Options” – “Data Execution Prevention” tab

Select “Enable DEP for all programs and services except those selected below: ...”, and use the “Add” button to add the necessary programs to exceptions. Add only programs that you know. Thus, you can disable this feature in Windows only for the necessary part of the programs.
