Create a system restore point manually. Creating a system restore point manually How to change the system restore point in windows 7
Read also
Windows 10 Restore Point is a very important built-in tool that allows you to return your system to a previous working state in case of failures.
The component of Windows that is responsible for system recovery uses System Protection, which regularly stores information about your programs, drivers, registry, settings and system files in so-called recovery points.
The operating system automatically creates restore points before significant changes to the system, for example:
- installation of programs;
- installation (updating) of drivers;
- installing Windows updates.
Another recovery point can be automatically created if the last point was created more than 7 days ago. It is also possible to carry out this process manually at any time.
To create a restore point, you must have computer administrator rights. You should also keep in mind that a restore point will only be created for those drives that have System Protection enabled.
Creating a Windows 10 restore point
1. First you need to launch the component “ System protection" To do this, in the menu “ Start» start typing the word « dot" and in the displayed list, run the item " Creating a restore point».
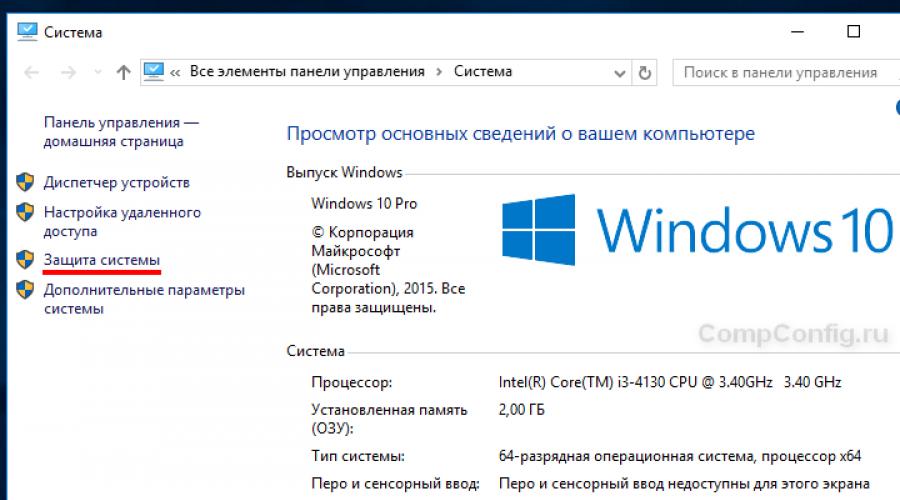
This is the easiest way to run a component " System protection" You can also do this by opening the system properties window (keyboard shortcut Windows + Pause) and selecting the required item in the menu on the left.

You can also open system protection through the control panel, but we will not dive into additional methods for launching this component and will continue creating a restore point.
2. Next you will be taken to the “ System protection" window " Properties of the system" If the buttons Restore" And " Create" are inactive, which means your system protection is disabled on all drives. You can verify this by viewing the list of available drives and the protection status: “ Disabled" or " Included" Click the button Tune».

3. If necessary, enable system protection by selecting the appropriate option. In this window you can also configure disk space usage and delete all recovery points for the current drive. Click the button OK».

4. Now click on the button Create", which should already be active.
5. Enter the name of the point to be created and click " Create" You don’t have to write the date and time here, because... they will be added automatically.


You can see where the Windows 10 restore points are located as follows. On the deposit " System protection" you need to press the button " Restore", then the button " Further».

What you should know when using restore points
- You should not use system restore points as the main tool for resuscitating the system. They should be thought of as an additional way to restore Windows, along with backing up and creating a system image.
- You cannot create a restore point while in safe mode.
- Restore points are stored for as long as the amount of disk space allocated to protect the system allows. If space runs out when new points are created, the old ones are automatically deleted.
- All Windows 10 restore points are automatically deleted if you turn off system protection.
- When you perform a system restore, programs and drivers installed after the restore point was created will be removed. In turn, programs and drivers deleted after creating a restore point will be restored.
There are many situations when we would like to fix a problem and return everything to its original state without loss.
In our article today, we will talk about backing up operating system settings by creating a recovery point (RBP).
This function will be appreciated by users who like to experiment with computer settings and install all kinds of programs.
Because in case of unexpected situations, it allows you to return to the previous, correct OS settings.
We recommend that all users create a CTV from time to time, regardless of the settings made in the OS, because in the event of an operating system failure, a restore point will allow you to return all the settings that were at the time of its creation.
Note! The OS reincarnation tool automatically creates a CTV every week, and also when the tool detects that changes are being made to the settings.
You can restore OS settings either from restore points that were created automatically or manually by the user.
Although backups contain both system and user files.
In the event of an OS rebirth, user files will not be affected.
Creating a restore point in Windows 7
Let's move from theory to practice and create a CATV in Windows 7 manually.
“Start”, right-click on the “Computer” menu item, select “Properties” from the context menu.

Go to the “System Protection” menu, which is located in the left column of the window.

In the “System Protection” tab, click the “Create” button. In the window that appears, enter the name of the cable TV and click the “Create” button.

The operation of creating a CATV takes place.

After some time, you will see a message indicating the successful completion of the operation.

Also in the “System Protection” tab you can change the settings for creating cable TV.
Click the “Configure” button, and in the settings window you can select objects for which you need to provide the ability to recover or completely disable system protection by checking the appropriate box.
You can also specify the amount of disk space that will be allocated for creating backups. To do this, just pull the slider to the right.
Advice! We recommend setting the maximum volume within 10-15% of the total volume of the section. If there is not enough space available for storing backups, old TVs are deleted and replaced with newly created ones. In order to delete all previously created CTVs, you can use the “Delete” button.

How to restore the system using a restore point in Windows 7?
Before resuming Windows, we recommend closing all programs and applications.
You must repeat all the steps given at the beginning of the previous section (Start - Computer - Properties - System Protection), but in the “System Protection” tab, click on the “Recovery” button.

In the next window, you should select a recovery point, based on the creation date and TV name. Click “Next”.

We confirm the seriousness of our intentions.

Please note that the process cannot be canceled while it is running. We confirm once again that we want to resume the system, click “Finish” and “Yes”.

A window will appear informing you that preparations are being made for system recovery, after which all programs will be forcibly closed, and a message will appear on the display indicating that files are being restored.

Once the recovery is complete, the computer will automatically restart. Now you can log into the OS by entering your credentials. This completes the process.

Features of working with restore points in Windows 7
To conclude the article, let’s talk about some of the features of working with CATV and provide solutions to problems that may arise:
CTVs that were previously created by you or the system can be deleted by some OS optimization utilities.
To solve this problem, we recommend that when using such utilities, you configure them manually and add the System Volume Information folder to exceptions.
CATV cannot be created on a laptop running on batteries. Connect your laptop to a power outlet.
CTV cannot be created for partitions formatted in the FAT and FAT32 file systems. Format the partition to NTFS. Do not forget that formatting will delete all data contained on the disk.
If you have 2 operating systems installed: Windows XP and Windows 7, when you start Windows XP, all CTVs created in Windows 7 will be deleted.
To avoid this problem, you should make the partition on which Windows 7 is installed and make it inaccessible to Windows XP.
How to create a Windows 7 restore point
In this video I explain in detail how to create a Windows 7 restore point, as well as why it is needed and why it must be created before each installation of a new program.

Restore points are quite useful. With their help, the user can roll back changes made to the system. This will help eliminate crashes and errors caused by newly installed programs or bugs. They are created automatically when installing programs and drivers, however, they can also be created manually. Windows backups will be discussed in detail in this article.
How to enable the creation of restore points
The OS itself makes backup copies when installing utilities or at certain times, however, this service can be disabled by user or you need to create a backup yourself.
To begin with, you need to get into control Panel, after which you need to go to point Recovery. In the section that opens, click on Setting up system recovery.
After this, a menu will open in the section System protection, in which you can perform all the necessary actions.
There are several other ways to launch this menu. Firstly, you can right-click on Computer and go to its Properties, in a new window, on the left side you need to click on System protection.
The second method involves using the Run utility, which can be called by holding win+r, after which you need to enter the command systempropertiesprotection. Any of these methods will allow you to get into such a window. 
Here you can see whether backup is enabled and for which disks. Typically the default system disk enabled, and the rest are turned off unless otherwise configured for them. The user can click on the drive of interest, and then find the settings item. 
In this window you can select options— whether the backup option will be enabled or not, as well as what exactly will be restored. It is possible to set the saving of windows settings and files or only files. At the same time, you can see how much space such information takes up, and also determine the amount of space that will be allocated for saving system parameters.
How to create a restore point
In the same menu mentioned earlier, you can also immediately create new backup. To do this, you just need to click on Create. After this, a window will be displayed in which you will need to enter its description. Next, it will take some time to complete the process, after which all the necessary data will be saved. 
How to rollback to a previous state
If you need to roll back Windows, you can do this from the same menu, however, there are other ways to find the desired setting. You can go to the control panel, go to restoration, and then launch it. 
To get here through the utility, you should enter rstrui command. One way or another, after all the actions, such a window will open. 
In this window you should select next, but in the next window select the date on which the rollback will be made. 
By choosing to search for affected programs, you can see what data will be affected and what files will be reverted to the previous version. This action does not affect documents and data only files and parameters programs and OS. Searching for data can take a very long time, it all depends on the version of Windows and the speed of the PC.
After making your selection, click on next and wait for the settings rollback process to complete. The computer will reboot. After rolling back the OS, most problems and system failures can be eliminated if they did not appear before the time when the copy was made.
How to view available points
This section will describe ways to view saved backups.
Using System Restore
This method involves the use of standard utilities, as described above. The simplest thing is to hold down win+r and enter rstrui, in the window that appears, click Next, after which the user is taken to the list of available elements for rollback.
CCleaner app
You can also use this free utility. You will need to download it and install it on your computer. Next, in the left menu, you should select Service section, and then proceed to system recovery. From this menu you can view or delete all available copies. 
Checking storage location - System Volume Information
This folder stores all the data for Windows rollback, however, you won’t be able to get into it just like that; first you will have to do several steps. First of all, you need to go to the control panel and go to Folder options.
In this window you will have to go to the View tab, after which you need to find the item “ Hide protected system files" and uncheck it. 
This folder can be seen in the root of the drive for which parameter backup is enabled. 
You can get into it only by obtaining the necessary access rights. First you need to right-click on the directory and select properties, in the new window you need to go to Safety. 
In this section you will need to select "Advanced". In point Permissions Click on the Continue button; for all these actions you must have administrator rights. 
In the new window you need to click on Add, then enter account name.
Next, you will need to set all the necessary rights, and also apply them to this folder and all subfolders. After this, you can go to the directory and see the data that is necessary to perform the rollback. You won't be able to delete them manually, but you can use the built-in disk cleanup utility.
Restore Point Creator application for working with points
Much can be done in Windows using standard tools, however, not everything. There is a program for working with system backups Restore Point Creator. With its help, the user will be able to delete individual backups, and not all at once. There is also the ability to view the number of megabytes that are allocated for each copy of the Windows state, and it is also possible to configure not only the automatic creation, but also the automatic deletion of system backups. 
It is better to download it from the official website www.toms-world.org/blog/restore_point_creator.
How to roll back the system if there are no points available
This section provides some advice on what to do if the user does not have copies in the OS that can be rolled back to.
Required Tools
The user needs media with LiveCD or recorded Windows. You will have to do it on another device if this has not been done in advance.
Set boot priority in BIOS
First, the user will need to go into the BIOS. To do this you need to press del orf2 at the initial stage of loading. If it doesn’t work, then you should look at what keys the computer asks you to press to enter bios. After logging in you will need to go to loading point or boot. In device priority, the first thing you should do is set a flash drive or other media with a LiveCD. After which you can press f10, which will allow you to save the settings and exit the menu. 
We use an archived copy of the registry
After booting from the drive, you need to copy all important data and documents to the drive so as not to lose them in case of unexpected failures. After this you should go to the directory Windows\System32\config\RegBack, which contains a copy of the registry. You need to copy all files from it and move them to Windows\System32\config\. You can also rename the data in this folder to avoid losing it. This will give you a chance to cancel actions if replacing the data does not bring the desired result. 
What to do if restore points are missing
Typically, all data is erased by the user himself when he runs the Disk Cleanup utility or one of the utilities for optimizing computer performance. In this case, you should carefully study their settings and uncheck the boxes to delete this data. There may be an option that the creation of points is not specified at all, in this case you need to check everything, how to get to the desired point is described at the beginning of the article.
There is another option for data disappearance. This may happen due to paging file fragmentation. In this case, you should go to the computer properties, log in to the system, then go to performance and set a fixed paging file size for each disk. Then you need to find pagefile.sys and delete it. Next, you should defragment the disk. The problem may go away after deleting the old file and setting a new one with a specific fixed value.
If the user has installed two Windows OS, then the backups will exist only until the moment he logs into the second OS. Here you need to look for solutions for each case separately, and then they may not exist.
How to cancel recovery
It may turn out that the rollback will not solve the problems, in which case it can be canceled. To do this, you will need to run the same tool as for the recovery itself. When you launch it, the following window will appear. 
All that remains is to select the first option and wait for the end of the process, which is identical to Windows rollback. If such a window does not appear, then you should go to the list of points. Every time the system is rolled back, a checkpoint is first created, so you need to select it and carry out the same procedure again, which will return everything to its previous position.
No restore point is created
Here are several ways to solve the problem if it is not possible to create new points.
Using Safe Mode
When starting the PC, you should pressf8, and then start the system in safe mode. Only the most important functions work in it, so you can activate Windows rollback feature, all services and utilities, except system ones, will be disabled and nothing can interfere with the procedure.
Checking system protection
If the points are not created, you must first right-click on the computer, go to management and select services there. It is worth checking whether services such as Volume Shadow Copy And Windows Backup. They are responsible for storing the necessary data.
It’s worth going into the standard utility again and making sure that the function is enabled for the system drive.
Checking availability of free space
It is worth checking how much space is left on the disk for which the point is being created. Usually Windows itself deletes old data to save new ones, but anything can happen. If there is little space, then you should clean the disk manually or using one of the utilities.
Uninstalling ASRock XFast USB utility
The problem may also lie in this program from the manufacturer ASRock. It’s worth first removing it for a while, after which to restart a computer and try again to manually create a backup.
Using System Restore
In the eight there was such a function as Refresh Your PC. It is capable of returning the system to almost its original state, while preserving settings, all applications and data. In fact, this is an analogue of recovery, however, not all settings and parameters are transferred, for example, the firewall and a few other things will have to be configured again.
You should press win+w and find . After it starts, most system files will be reset, then you can try to create a backup again, most of the problems can be solved by resetting Windows. 
Now the reader knows everything about how to use restore points in windows 7 and windows 8, and also knows about troubleshooting methods related to this service.
The correct operation of Windows 7 depends on the presence of registry files and data in it. If they are damaged or deleted, the functionality of your computer will be impaired.
In this case, the following problems will appear: slow operation, it is not possible to download the programs you need, or they do not work correctly. It may be that the PC does not want to turn on at all.
This always unsettles you, especially if the work directly depends on the use of a PC, but you can fix the problem without the help of a wizard. The Windows 7 operating system has everything you need to solve this problem yourself. To restore your computer to functionality, you should use the system restore function. Now you will find out what it is, what it is for, and how to create rollback points.
What is System Restore?
The System Restore function is designed to return the operating system to the time when it was functioning normally. It may be required if you delete any files that ensure proper operation of the OS.
It can be violated by:
- malware;
- banal non-compliance with the rules for using system files.
For those who do accounting or play computer games, reinstalling the entire operating system is absolutely unacceptable. Moreover, if the user did not have backup copies of documentation on another local disk or drive, then reinstalling will simply destroy the work of creating reports.
System recovery affects only files that are important for the OS, so the user’s worries about deleting photos, movies, and other multimedia elements are in vain. Letters that the computer owner received by email will also remain intact, so you can stop worrying about their safety.
Windows 7 uses System Protection by default. But it is advisable to use it only for system local disks, and for others it is recommended to disable it.
To do this it is enough:

There are many more types of returning the operating system to normal operation.
This operation is carried out using the following methods:
- by loading the last favorable setting- the simplest and most frequently used method of restoring functionality. The first step is to enter safe mode, to do this sufficiently, restart the computer, press F8, select “Safe Mode”, and then click “Enter”;
- in the normal mode of returning the system to normal– thanks to this method, the functionality of the OS is recorded, and at the moment, using safe mode and the original Windows 7 disk, enter “Safe Mode”, insert the installation disk and select not installation, but recovery. Thus, using the boot disk, an analysis of the system’s operation will be performed, faults or the absence of certain data will be identified, and then a rollback will be carried out;
- using a previously made backup– at this stage, a renewal occurs using a previously created archive of your Windows 7. Data from it can be written to a USB drive from which the rollback will be carried out. It is executed as in the case of an installation disk.
To return the OS to normal operation, a special point is created from which this will happen.
It contains registry settings and other information that is used by Windows 7. It is similar to a game checkpoint, from which, if the OS fails, it will restart. Follow the procedure before installing new software. You need to figure out how this is done.
Video: Creating a point
Creating a recovery
There are two ways to create a Windows 7 restore point:
- manually;
- automatically.
The first step is to understand how it is created manually by a PC user.
Manual formation process
The algorithm for creating a rollback point is simple and consists of step-by-step execution of the following steps:

Photo: right-click menu

There is nothing difficult in using the manual method, however, thanks to the automatic solution to the problem that has arisen, you can once and for all get rid of the inconveniences associated with restarting Windows 7.
Automatically create a Windows 7 restore point
In order to save yourself from the need to manually create a rollback, Windows 7 users are presented with a simplified version by its developers. It allows you to automatically create a rollback every time you start it. This method is a little more complicated, but much more effective, more comfortable and completely makes life easier for all PC owners.
There are two possible methods for automatic creation:
- fully automatic – the rollback will be created without the user’s knowledge;
- semi-automatic - you will need to enter the name of the point each time the system starts.
The choice of one method or another is purely individual, but most equipment owners prefer the first because it deprives them of the need to do anything additional. Next, you will be provided with two automatic creation codes. They should be copied into a text document and then saved using the “.vbs” extension.

It will be very important to take into account that if Notepad is used when creating, at the time of saving, select the file type “Text files” and the name will need to be created in quotes, for example, “Title.vbs”. If you have the All Files file type selected, you can choose not to use quotation marks.

Let's look at the algorithm for further actions step by step:

Regardless of which option was selected, the system will now automatically create a restore point every time it starts. This is very convenient because you do not need to perform manual operations before each installation of new software on your computer. Work without fear of problems, because the rollback can start at any minute.
Questions and answers
Now let's look at the answers to frequently asked questions regarding all of the above.
Is it possible to mark the changes made during the correction/restoration?
Changes made can be canceled by the user. To do this, just go to “System Restore” and click undo changes. This operation is recommended if problems related to the operation of Windows 7 cannot be resolved.
Video: Rollback Windows
What files are changed on the system during recovery?
Only system and registry data will undergo changes. Reverting your operating system leaves your personal files intact, so you don't have to worry about your photos, music, videos, and email. Resume is unable to return previously deleted documents and files.
How to choose a restore point?
How long does a restore point last?
They are saved until they fill the space allocated to them on the local disk. In addition, the system can automatically delete outdated ones, and if the user of a personal computer disables “System Protection” on the local disk, then all the points made for it previously will be deleted.
Windows 7 resume points are missing, what should I do?
They may disappear if you have another OS installed in addition to W7, and the defragmenter can also delete them along with shadow copies of data. In addition, you may not have enough memory for them or the system is cleaning them up on its own.
Can't create a point?
To solve the problem “I can’t create a point”, go to the “Control Panel”, select “Administration”, then go to “Services”. In the window that opens, find “Volume Shadow Copy”, double-click and change the management status to “Manual”. After this, the inconvenience will be eliminated.
The Windows operating system has a convenient functionality - creating restore points that allows you to save the state of your computer on a specific date. This saves all settings, system files and installed software. It does not affect user files. If necessary, you can always return the computer state to the day you need.
How to create a restore point in Windows 7, 8, 10 just in case
It is very important to create such points before working with the registry or changing system files. Some programs, for example, antiviruses, create them automatically before removing viruses so that if the removal is unsuccessful and the operating system crashes, you can return to a working state and remove the virus in another way. Before updates are installed, restore points are automatically created.
How to create a one-time restore point
Let's look at how to create a restore point using Windows 8 as an example; for 7 and 10 the steps will be similar.
- Right-click on the “This PC” icon and select “Properties.” In the window that opens on the right, find the “System Protection” item and enter it.
Click on the "Create..." button if you need to create a system state record. Or “Restore” - if after installing a program or driver the system began to behave incorrectly.
- Click "Start" - "Control Panel" - "Recovery"

In this window, you can start the process of returning Windows to a given state, or make the necessary settings.
How to Automate Restore Points in Windows
You can automate the creation of such points using the Task Scheduler. Click "Start" - "Control Panel" - "Administrative Tools" - "Task Scheduler". In the scheduler itself: “Scheduler Library” - “Microsoft” - “Windows” - “System restore”. For the “SR” file, through “Properties”, set the necessary triggers (execution conditions) and save the changes.